Showing posts with label diy. Show all posts

Monday, 10 December 2012

How to: 1960's hair!


    Today we're going to show you just a few of the many ways you can create that beautiful 1960's       hair! As we've said before, we love the 60's! Makeup, Clothing, And of 'course the hair! This tutorial is fairly easy, but not recommended for everyday use as there is a lot of backcombing and that can be damaging to the hair if done frequently. So keep it to the partaays!

So what you need for this is:

A comb
Hairspray
Bobby pins
Hot rollers (optional)
Hair ties


Start off with putting hot rollers in your hair. You don't have to do this, but it is strongly suggested. They will add volume and a soft feminine look, and curls hold hairstyles better.


Take them out and gently brush through them with your fingers.


Now take a small section at the front of your head and pin it out of the way. Now taking your hair in layers start backcombing. Don't be really rough with your hair! Just gently drag the comb backwards on   your hair.  Hairspray as you go along.


Now once your done take the section you pinned aside and very carefully brush it back over the teased parts. This is going to hide the mess. You can already see how much smoother it looks here than before! We also left two little front sections out, and pinned them around the back to give it a more defined style. See how much more noticeable the bump is now?


Here we pulled the hair into a low side ponytail. You have to be careful though, because it does flatten to poof a bit.


Our last one was actually a mistake. We tried putting the hair into a high pony, but it looked like a weird alien head. So we twisted the hair into a bun instead, and although it's hard to see them, added some flowers. This is a much more formal look. It would also look nice if you took the hair when it was down, and pulled it into a french twist. 

P.S Hairspray hairspray hairspray!!!

So We hope you enjoyed this, and try it for yourself!


- veda & Riel xoxo

Saturday, 24 November 2012

How to: 1960's makeup

The 1960's is one of our favourite time periods and we love the makeup, so we thought we  would do a 1960's inspired makeup look. 

First apply white eye shadow all over your eyelid.

Next apply a medium brown or grey eyeshadow in your crease and the outside corner of your eye, blend well.


Repeat the same process with a slightly darker colour to add depth. 
I did classic thick 60's eyeliner, but if u prefer it thin, do what makes you feel comfortable!  (using liquid eyeliner)


I curled her eyelashes, applied some mascara and finished the look off with a light pink lipstick.

If you want a more dramatic 60's look, apply black pencil eyeliner underneath the eye, white eyeliner in the waterline, and false eye lashes!


Thanks for reading!

Sunday, 18 November 2012

How to: Make your shoes glittery!

Hey awesome people! We're gonna show you how to make amazing glittery shoes! It's super easy, and fun, and a great thing to do with your friends!

So, what you'll need to do this is glue, and glitter, some sort of tray, a brush, and of corse some shoes.We used two different types of glue, extra tacky glue and acrylic gloss, but you don't need both of them, we just ran out half way through and had to use the gloss.

For glitter any kind should work, but keep in mind that the smaller the glitter, the more smooth it will look on the shoes, and the bigger the glitter the more chunky it will look. You can buy glitter at the dollar store, or Michael's craft store.

 Now it's very important that the shoes you use don't have tons of straps and buckles on them because it will be really hard to cover in glitter, and will look gross and bumpy. 


Pour some glue into your tray, and then slowly add glitter in bit by bit.


It should look like this. Now mix it all up.


So now it will look like this. The next step is to take your brush and start painting it onto the shoes. Don't do really thick layers, it will take longer to dry and look weird. Thinner layers and lots of layers look better.


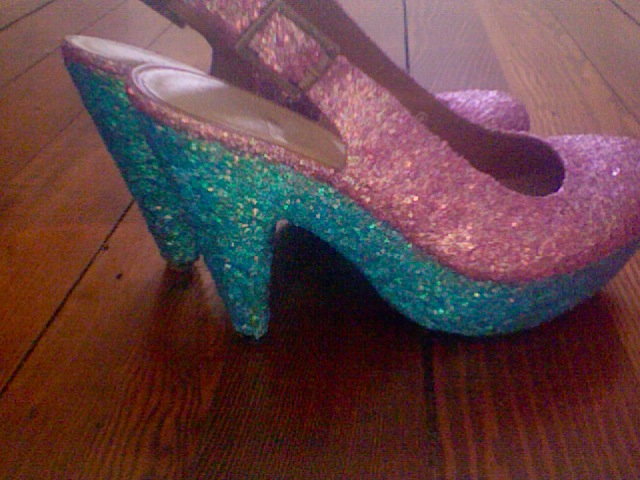
This is what they should look like after two layers, and don't worry about the glue, it will dry clear. Now all you have to do is wait for them to dry and then do another layer. Continue this until your shoes are totally covered. If you have any areas that have less glitter on them go over with your brush after they have dried to fix it up.


And this is the finished result!


So enjoy your new super-duper cool glittery shoes!